I am a big fan of SAS Management Console. This is the central location where you can perform many of your SAS administration tasks. One of the most important tasks of a SAS Administrator is making sure data is available to the right people when they need it. Most of my customers have data that sit in several different locations. It is very common for that data to reside on a DBMS. We can use SAS Management Console to make it easy for SAS users to work with DBMS data.
First thing to note—like many things within SAS Metadata, SAS Management Console itself is role-based. If you are handing out SAS Management Console to more people than just your SAS Administrators, you can set it up so that a user can see only the plug-ins that apply to their job. For example, a user can have a role that allows them to see the Library Manager but not the Server Manager or the User Manager plug-ins.
There are two main steps to set up access to DBMS tables. First, you register the DBMS server. Second, you register the DBMS library. A SAS administrator who has privileges to work with the Server Manager plug-in in SAS Management Console can complete the necessary tasks to set up the access to DBMS tables. For illustration purposes, I’m going to show a SQL Server DBMS. However, these steps can be generalized to any DBMS.
Register the DBMS server
First, let’s register a SQL Server inside SAS Management Console using the Server Manager plug-in.
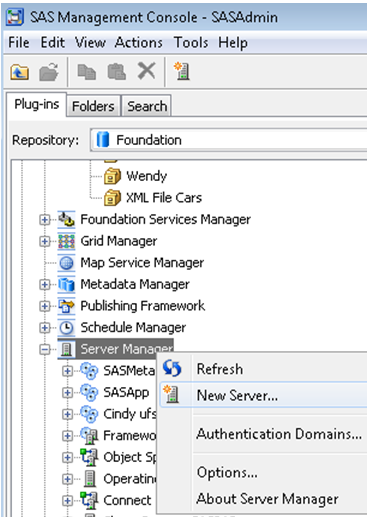
- Open up SAS Management Console and log in as a user that has administrator privileges. Right-click Server Manager and select the New Server option to access the New Server wizard.
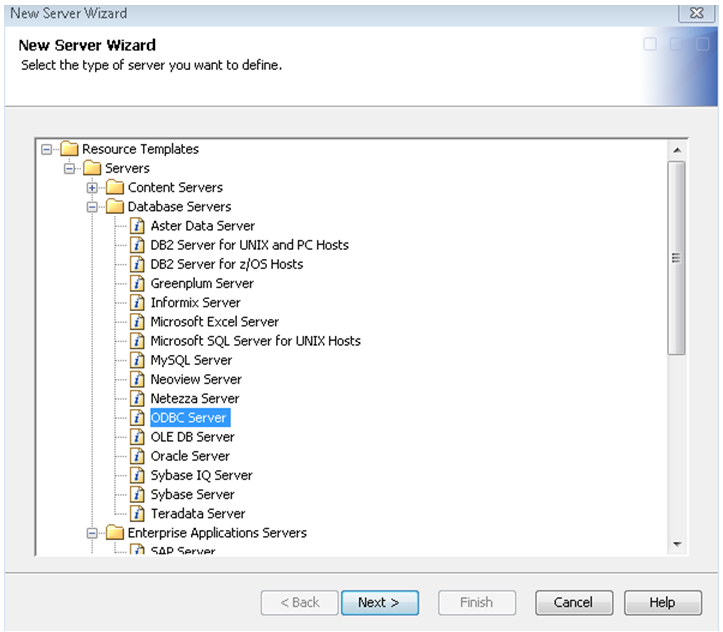
- Select the database server type from the Database Servers list. Then, click Next.
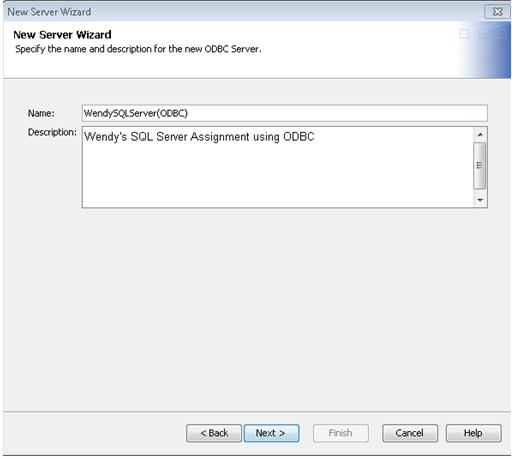
- Enter an appropriate server name in the Name field. Click Next.
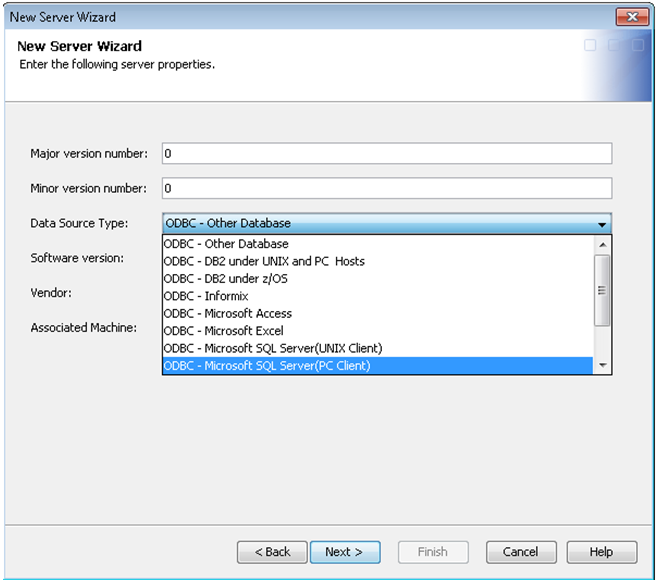
- From the drop down menu, select the appropriate data source type if you are working with ODBC. I am selecting “ODBC- Microsoft SQL Server(PC Client)”. Accept the remaining defaults for the server properties. Click Next.
- Specify the database vendor-specific values on the connection properties page. If the user credentials for the database are different from the credentials used to log in to SAS, then you must create an authentication domain to store valid database credentials. Click New if you wish to create the authentication domain now. Otherwise, use the drop-down menu under Authentication Domain to select the appropriate authentication. Then click Next.

- Examine the final page of the wizard to ensure that the proper values have been entered. Click Finish to save the wizard settings.

Register the DBMS library
Next, following our previous example, let’s register the SQL Server library.
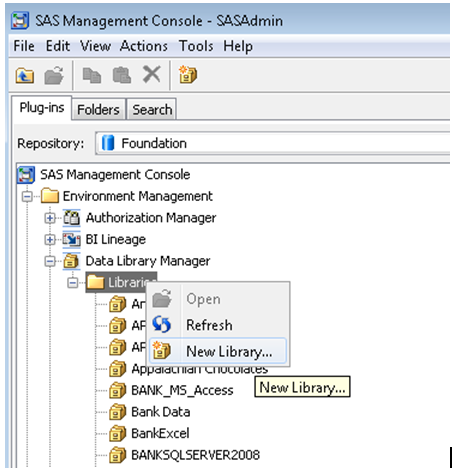
- In SAS Management Console, expand Data Library Manager. Right-click Libraries and select the New Library option to access the New Library wizard.
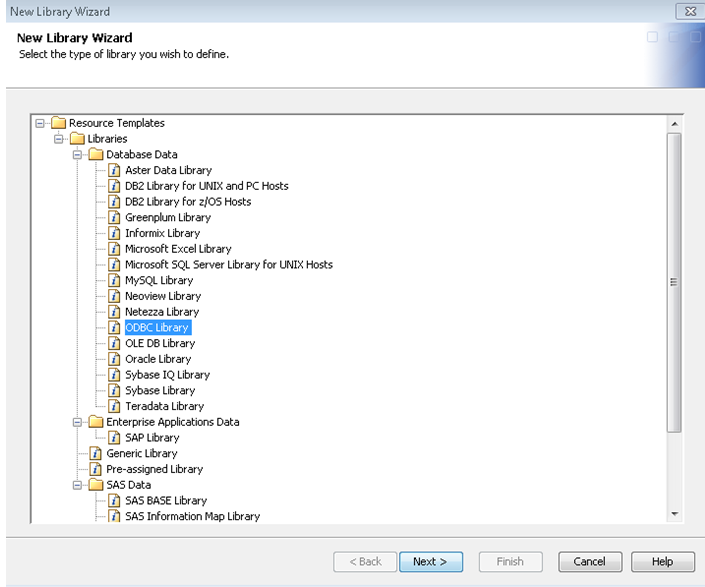
- Select the database type from the Database Data list. Click Next.
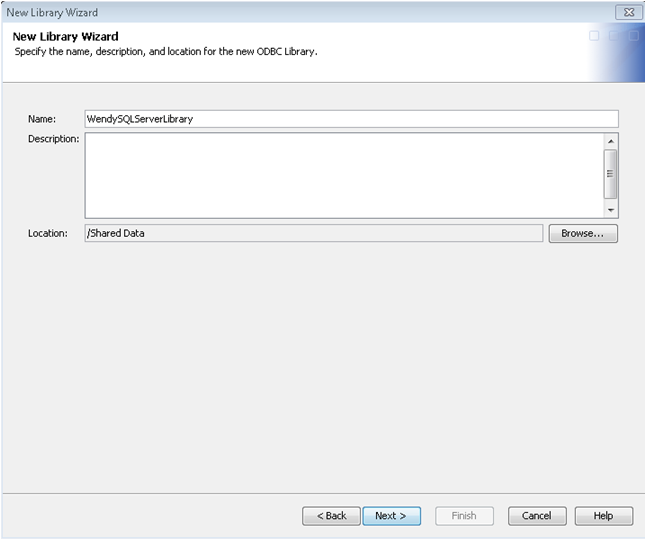
- Enter an appropriate library name in the Name field. The Location field is the Metadata Folder structure. You can change it by clicking Browse. Click Next when finished.
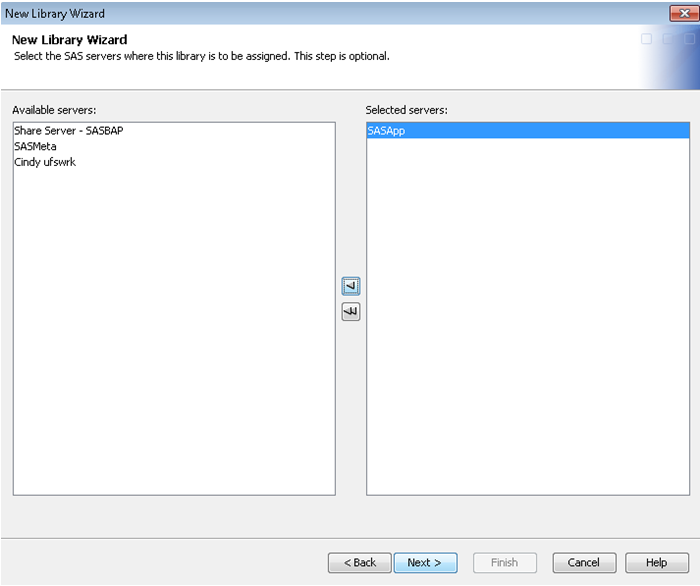
- Select an application server from the list, and use the right arrow to assign the application server. This step makes the library available to the server and makes the library visible to users of the server. Click Next.
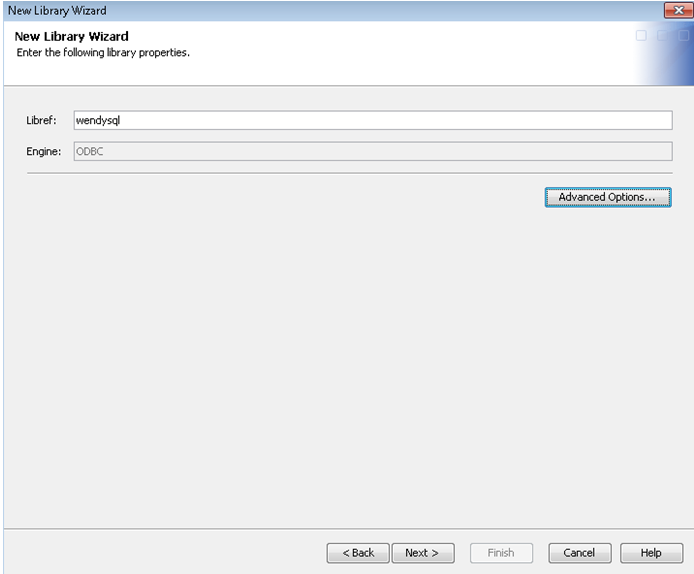
- Specify a libref on the library properties page. A libref is simply an 8 character alias to a library, and it follows standard SAS syntax (no special characters, cannot begin with a numeric). You can also click Advanced Options to perform tasks such as pre-assigning a library. However, I always recommend to my customers not to pre-assign a library if they are hitting a production database. Click Next to access the next page of the wizard.
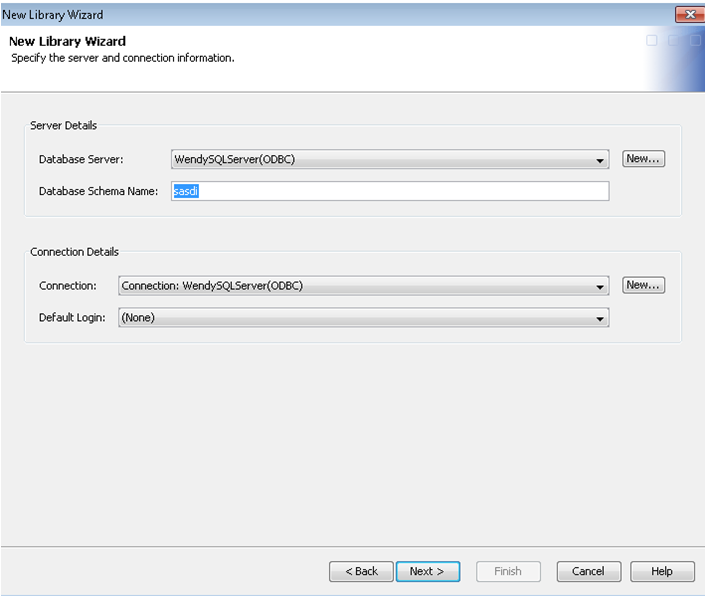
- On the server and connection page, select the database server we set up previously. Contact your database administrator if you are unsure of the correct value for the schema field. Click Next.
- Examine the final page of the wizard to ensure that the proper values have been entered. Click Finish to save the library settings.

From here, you can register tables and work with your DBMS data the same way you would work with SAS tables!
Please note that some of the techniques discussed here require a SAS/Access engine to allow SAS to reach the data source. The above technique used the SAS/Access to ODBC engine. See
Chapter 2 of the SAS 9.3 Intelligence Platform, Data Administration Guide: Connecting to Common Data Sources.

6 Comments
It's very useful and easy to understand .
Thanks for your help and support.
Can I have 2 database schema's in 1 library ?
how to specify catalog/database/qualifier in this form?
Hi Lenny,
Once you have followed the above steps, you will need to register tables as outlined in this chapter, "Registering and Verifying Tables".
http://go.documentation.sas.com/?docsetId=bidsag&docsetTarget=n0g5t6jbzorstsn18d5e9h7ngdkw.htm&docsetVersion=9.4&locale=en
Essentially, once you have created the library, here are the steps to register a table:
1. Open the SAS Management Console, if necessary.
2. Select Data Library Manager then select Libraries to see the list of libraries.
3. Right-click the library that contains the tables that you need to import and select Register Tables.
4. Verify that the values shown in the fields in the Library details group box are correct. Click Next.
5. Click the tables that you need to select. (Hold down the Ctrl key and click to select more than one table.)
6. Check the metadata folder path in the Location field. Navigate to a folder or create a folder that has metadata permissions for user and group access that meets your business needs.
Click Next.
7. Examine the final page of the wizard to ensure that the proper values have been entered. Click Finish to save the wizard settings.
Note: You can also register tables by using SAS Data Integration Studio or by using the METALIB procedure. For information about using the METALIB procedure, see Managing Table Metadata.
Thank you very much!
Wendy
Hi Len,
Thanks so much! I'm glad you found the post helpful.
Here is some more information that could help:
http://support.sas.com/techsup/technote/ts765.pdf
Otherwise, SAS Technical Support could help you solve this problem. Please reach out to them at http://support.sas.com/ctx/supportform//createForm.
Thank you so much!
Wendy
Many thanks for this - I am trying to set up this ODBC SQL Server, but when I get to the last screen on the New Library wizard it is just blank...The ODBC Server Wizard worked fine and we got the ODBC Server set up, but not the Library Wizard.
Any ideas?
Len